
| This area shows the functioning Tesla coil being tested as well as some other minor improvements being made. The tesla coil project is aimed mainly at the scientific and Tesla coiler community. I intend to use my Tesla coil for lightning demonstrations and entertainment. Note - This page may take a while to load on some SLOWER connections! |
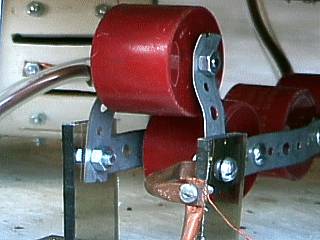
This section includes any subsequent changes to the Tesla coil design after part three above. Such modifications and experiments include trying different sized top loads and toroids, tweaking the tank capacitor values, even trying different spark gap designs. For this design step, heavier copper tubing (1/4 inch), the same used for the primary, was covered with clear neoprene tubing and used for high RF current paths of the primary circuit. The spark gap was also changed and redesigned based on the TCBOR (Tesla Coil Builders Of Richmond) concept. This spark gap also has an electrode section that can be removed without having to take the entire TC base apart.
Lessons learned - Try to use a TCBOR type spark gap for ease of operation. Using higher guage primary wire (or copper tubing) can yeild better performance and sturdiness.
|
Here is a nice bolt-on modification to my latest Tesla coil design. I attached two 2500 pF doorknob capacitors to the existing bus of 5 doorknob caps. This changed the value from about 1.25 nF to 1.75 nF. The result was a hotter and slightly longer spark length while changing the number of turns in the primary tap from 9 to 7. The capacitors also were much cooler to the touch after this change. This design allows caps to be added or removed easily for experimentation. Note the new connections made from 1/4 inch copper tubing instead of RF cable. The tubing is heavily insulated in a jacket of clear neoprene tubing and bolted to components where RF frequencies are expected. Although the addition of the tubing was more robust, it didn't effect output spark performance too much. |

|
Another modification to the Tesla coil for experimentation was the redesign of my spark gap, again! This time I chose the TCBOR (Tesla Coil Builders Of Richmond) design, which is very similar to the Richard-Quick spark gap. In the TCBOR type, the fan and assembly are the same way as in the RQ gap with copper tube electrodes around the inside of the pipe. The difference is that instead of air axially flowing through the pipe, air enters slits in the side of the pipe with the other end of the pipe closed. In this design the spark gap unit is in two pieces, one is a 4-inch PVC pipe containing the electrodes, the other is a cut pipe coupler which the 120 VAC fan is attached to. There are a total of 9 3/4 inch copper tubes about 3-inches long each held by two bolts. The end of the second piece is closed off with clear plexiglass and can also be detached if needed. This gap should be the most reliable and cool running. The electrodes are connected with 1/4 copper tubing covered with clear neoprene tubing for insulation. Plexiglass brackets and bolts hold the SG in place. The removable plastic piece on top was used to insulate bolts from the wood TC deck to prevent unwanted arcing. |
|
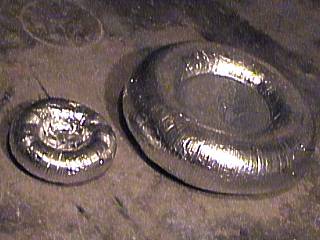
These are a collection of additional toroids for my Tesla coil. There are two extra top loads shown here, one an undersized toroid, the other an oversized one. These can easily be attached to the top of the secondary on my Tesla coil in its present stage of development. Many spark pictures in this section show the small toroid atop the sperical top load of my coil. The small toroid is made from 4-inch aliminum ducting and is about 10 inches in diameter. The large toroid is made from 6-inch aluminum ducting and is about 24 inches across. Spark breakout is minimal with the larger toroid and breaks out on a small nail in its side. The smaller toroid produces a heavy corona and breakout effect when affixed to the coil's top load. I use these top load toroids here for experimenting. |
|
This is a picture of myself, in total darkness, holding a fluorescent light tube about 8 feet away from the Tesla coil at about 50% power. The top load is surrounded by a purple glow (corona) visible in the foreground of this picture. The fluorescent tube lights without wires due to the intense RF electric field in the vicinity of the coil. |
|
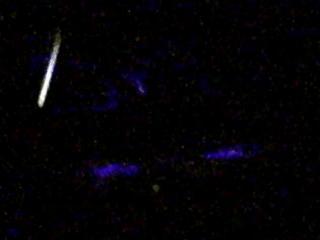
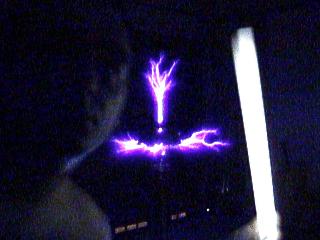
This picture shows another view of myself, barely visible in the darkness to the right waving a fluorescent light tube about 8 feet from my Tesla coil at about 50 percent full power. Note the corona effect around the flange of the Tesla coil top load as well as at the breakout point (bolt) on the top of the unit. |
|
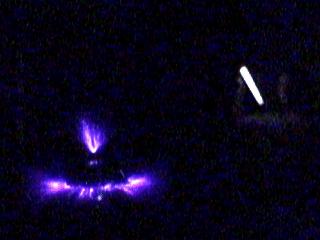
Here is a picture of my Tesla coil at full power in the backround producing streamers in excess of two feet in length as I stand in the foreground holding a fluorescent tube. I am about 8 to 10 feet in front of the Tesla coil, standing on the left in this picture, and holding the tube close to the camera as it is illuminated by the RF energy field. Looks like "magic" but it is only physics. |
|
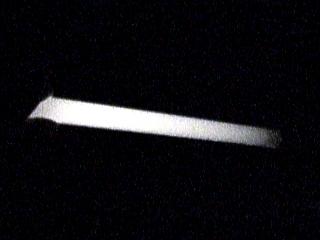
This is a closeup of a fluorescent tube lighting up in my left hand while standing about 10 feet from my Tesla coil. The coil, out of view to the right in this picture, is at about 75 percent full power. The fluorescent lamp tube contains a low pressure gas and mercury vapor. When excited by radiation of electricity through space at high frequencies (RF), the gas inside the tube inonizes giving off enough UV rays to excite the phospor coating and make the lamp glow. This demonstrates Nicola Tesla's intentions of "transmitting" electricity through space without wires ... It works! |
|
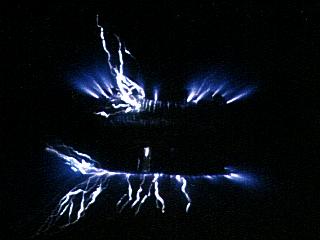
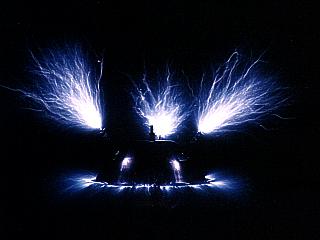
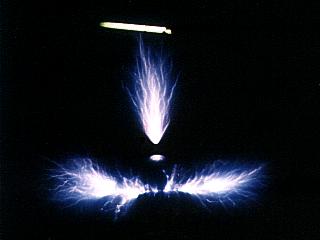
This picture is a 5 second time exposure (Canon Rebel 2000, Fuji 400, f5.6, bulb setting) of power arcs to a grounding rod being moved around the top load of my Tesla coil at medium power. The grounding rod cannot be seen because it is being moved in the time exposure, but the brighter power arcs mark where they discharged. The top load is a spherical top with an extra toroid on top. The power arcs drawn were about a foot in length. |
|
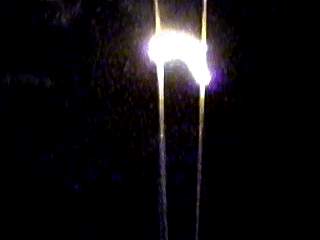
In order to test the HV output of the neon sign transformer, I attached two of the high voltage outputs to a jacob's ladder. This is simply two stiff bare copper welding rods extending from an insulated base, with a 1/4 inch separation at the bottom, tapering to a few inches apart at the top. The two copper electrodes are about 3 feet high. When energized with 12 kV at 60 mA, an arc starts at the base of the unit where the separation is 1/4 inch. The hot plasma of the arc is much lighter than air and rises up the unit until the electrode spacing is too much to sustain the arc near the top. The arc stops and restarts again at the bottom of the unit and the process repeats. This device is very fun to watch, and has been seen in the famous Frankenstein movie science scenes, which were real jacob's ladders. The arcing also produces an audible 60-Hz buzzing sound due to the mains frequency in the US. Because of the low freqnency and high voltages invloved, contact with the arc or its electrodes can result in electrocution at 60 mA, so use caution around jacob's ladders. |
|
This picture is a 5 second time exposure (Canon Rebel 2000, Fuji 400, f5.6, bulb setting) of hot power arcs to a grounding rod left of the Tesla coil top load at full power. The arcs here are over a foot long but are very hot. The top load is a spherical top with an extra toroid on top. The grounding wand is in the left side of this picture. Note the purple "glow" in the lower left part of this picture from the corona effect. |
|
This picture shows an 18 inch arc jumping from the top load of my Tesla coil to a discharge wand at about 75 percent full power. The purple glow is the corona and small streamers around the top sphere of the coil secondary. The discharge wand is a long, insulated wooden rod with a doorknob at one end for an electrode. The wand has a high-voltage wire and alligator clip so it can be clipped to an RF ground such as the Tesla coil strike rail. The discharge wand is to the left in this picture. |
|
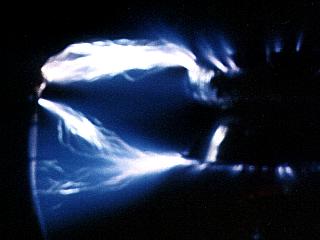
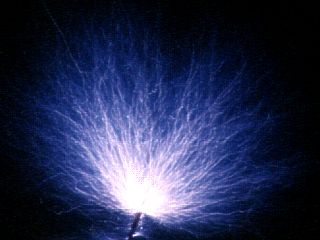
This picture shows several sparks eminating from the spherical top load of my Tesla coil when at 100 percent power. The top load, basically two metal salad bowls bolted together, causes spark breakout at its seams. In this picture, spark breakout and corona is evident, including a two foot (24 inch) spark to the right. |
|
In this picture, a small metal screwdriver was placed on top of the sperical top load with the Tesla coil at full power. Spark breakout was enhanced in an upward fashion from the tip of the screwdriver. The sparks here are over two feet long. Also note the purple glow and corona breakout along the seam of the two metal hemispheres of the top load. |
|
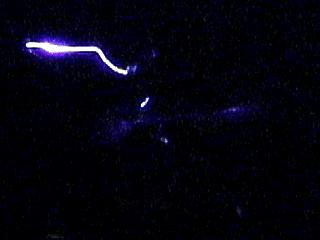
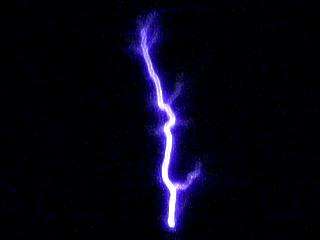
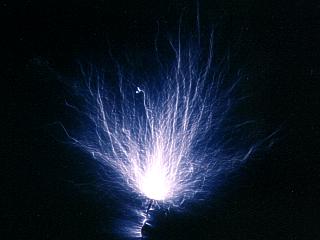
This picture shows a single branch of a two foot-plus spark that shot straight up from a metal bolt on top of the top load sphere when the Tesla coil was operated at full power. The blur is because the spark was moving around violently as this frame was was taken from a video. |
|
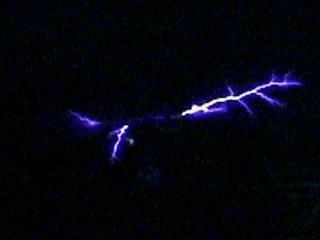
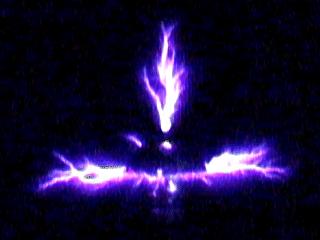
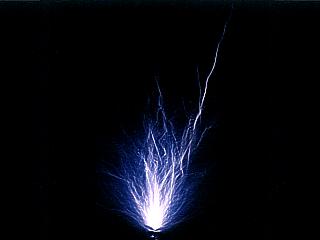
This is another picture of my Tesla Coil near full power. The streamers and sparks are nearly 30 inches in length when the coil is properly tuned. Different sized top loads and toroids require re-tuning of the Tesla primary taps and have different results. In this picture, sparks break out from a bolt on top of the top load sphere as well as from the flange between the two hemispheres. |
|
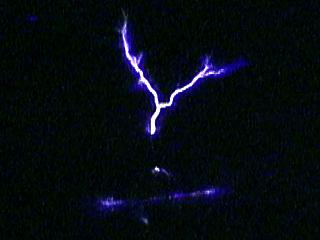
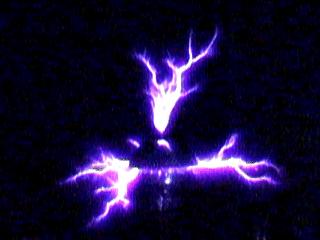
Yet another picture of my Tesla Coil near full power. The streamers and sparks are constantly changing and "dancing" from the break out points. Within a few seconds of operation, a strong smell of ozone develops in the garage, and needs to be vented. |
|
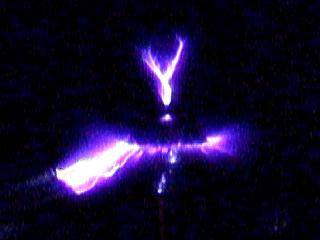
This picture, showing my Tesla Coil near full power, shows a hot spark being drawn to the grounding wand. The wand is about two feet from the top load to the left in this picture, and is actually drawing numerous arcs and streamers to it. I am in the left of this picture and not visible. The tip of the grounding wand is a 2 inch brass doorknob that is connected to a grounding wire with an alligator clip on the other end to clip to the strike / RF ground rail of the Tesla coil. |
|
This is a time exposure of a spark breakout from a small wire attached to the top load of my Tesla coil at 75 percent power. The time exposure is about 5 seconds (Canon Rebel 2000, Fuji 400, f5.6, bulb setting). The longest discharge is more than a foot long. |
|
This is a time exposure of a spark breakout from a small wire attached to the top load of my Tesla coil at full power. The time exposure is about 5 to 10 seconds (Canon Rebel 2000, Fuji 400, f5.6, bulb setting). The longest discharge is about 20 inches long. The wire tip demonstrates how Tesla coil energy "wants" to radiate into the air due to the RF frequencies involved. |

|
This picture is a 5 second time exposure (Canon Rebel 2000, Fuji 400, f5.6, bulb setting) of the top load of my Tesla coil with an extra toroid on top of the main spherical top. The breakout occurs along the seam between the two halves of the sperical load (lower ring of sparks) while a larger breakout occurs from the toroid surface added on the top of the sphere. Maximum length here is over a foot at 75 percent power. |
|
This picture is a 5 second time exposure (Canon Rebel 2000, Fuji 400, f5.6, bulb setting) of the top load of my Tesla coil with three nails taped to the upper hemisphere of the spherical load with aluminum tape. The 3-inch long nails cause a large breakout of sparks from their tips, some nearly 18 inches long. The Tesla coil here is between 75 percent and full power. |
|
This picture is a 2 to 3 second time exposure (Canon Rebel 2000, Fuji 400, f5.6, bulb setting) of the spark breakout from a small bolt terminal on the spherical top load with my Tesla coil at full power. Note the one thin and long streamer from the bolt extending up and right in the picture. This spark was over two feet long. |
|
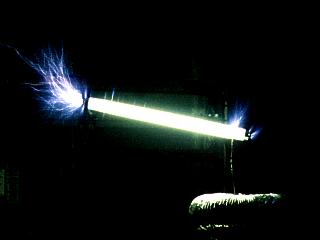
This picture is a 2 to 3 second time exposure (Canon Rebel 2000, Fuji 400, f5.6, bulb setting) of a fluorescent light bulb mounted on the top terminal of my Tesla coil at medium to high power. The right end of the tube is held in place by stiff wire with the other end not connected to anything. The tube is exited and glows brightly as the gas within is ionized. The ionized gas conducts electricity, so spark breakout also occurs at the free end of the tube. If you look closely, you also see some small breakouts and corona along the surface of the fluorescent tube. |
|
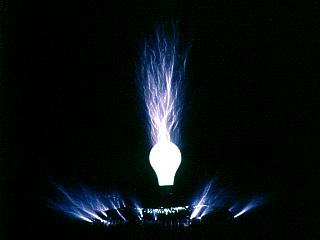
This picture is a 5 second time exposure (Canon Rebel 2000, Fuji 400, f5.6, bulb setting) of a 75 watt light bulb mounted on the top terminal of my Tesla coil at medium to high power. The argon inside the light bulb is exited and glows, while the filament heats up and lights the bulb somewhat. Note the breakout "through" the glass top of the bulb and nearly a foot into the air above it. The toroid is mounted on top of the sperical top terminal while the light bulb is held in place by a loop of stiff wire. |
|
This picture is a 5 second time exposure (Canon Rebel 2000, Fuji 400, f5.6, bulb setting) of my Tesla coil at full power with the spherical top load radiating sparks from its seam and terminal bolt on its top. Maximum spark length here is from over 18 inches to two feet. I am standing in the backround holding a fluorescent tube which lights up in my hand, about 10 feet behind the coil. |
HTML File "tcpart4.htm" - Developed By Chris Collura
To Return To The HOME Page Of This Site Click The "INDEX.HTM" Link Here!